Introduction
Welcome to our API documentation.
General information
This documentation describes the Teliqon REST API - a set of HTTP endpoints that give you programmatic access to your Teliqon account.
What you can do
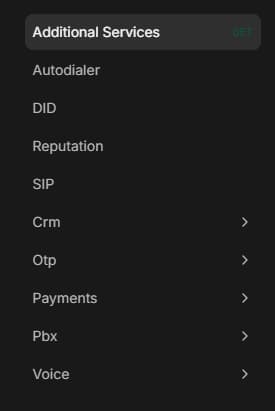
The API covers the following product areas:
- Additional Services: retrieve and manage extra services assigned to your account (VPN, experimental features, etc);
- Autodialer: manage your autodialer subscriptions;
- DID: manage Direct Inward Dialing numbers and export them;
- Reputation: check the reputation and lead status of phone numbers;
- SIP: set up and control SIP connections;
- CRM: manage your CRM subscriptions;
- OTP: send SMS and access message data (history, export, statistics, etc.);
- Payments: manage billing and payment operations;
- PBX: configure PBX subscriptions and extensions;
- Voice: retrieve statistics, traffic reports, and other data for voice calls.
Use the sidebar to navigate between sections. Each section contains one or more endpoints with full parameter descriptions, request examples, and response schemas.
How the API works
The API follows REST conventions:
- All requests are made over HTTPs;
- Request and response bodies are JSON;
- Standard HTTP methods are used: GET to fetch data, POST to create, PUT/PATCH to update, DELETE to remove;
- Every response - success or error - follows the same predictable structure.
Authentication
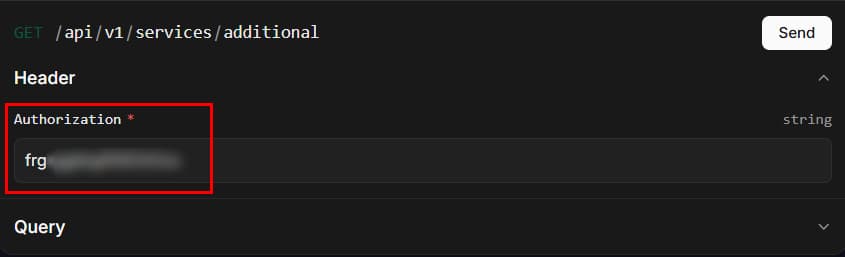
Every request must include your API token in the Authorization header:
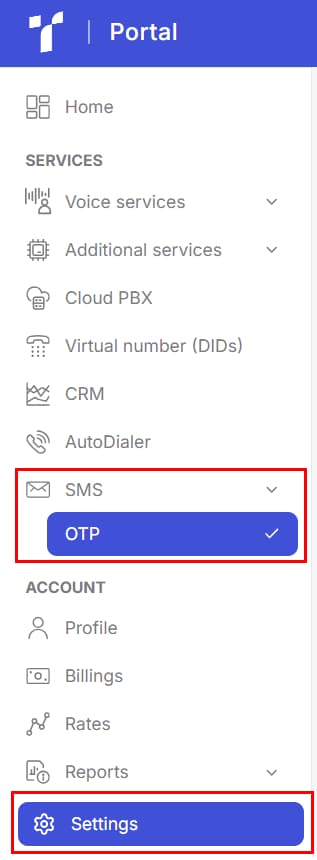
To get your token, go to Teliqon Portal cabinet → Settings section → API Settings; or SMS section → OTP → API Settings:
You can also contact technical support if you do not have a token or need any assistance.
IMPORTANT: keep your API Token strictly private - it grants full access to your account.
Response structure
Successful response
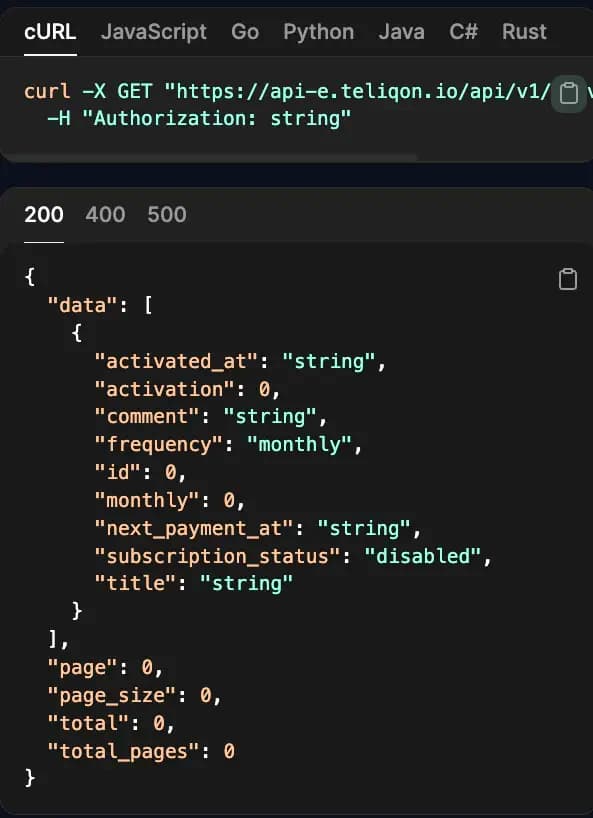
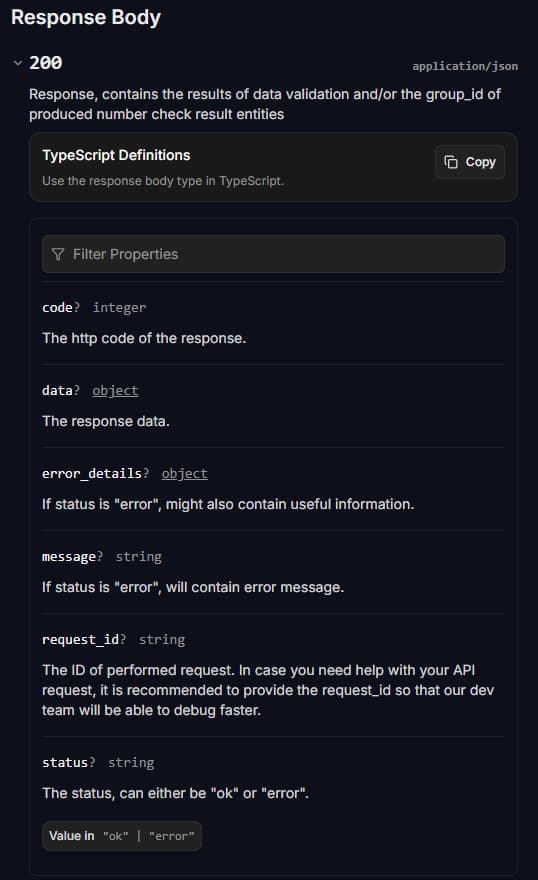
A successful response always returns a JSON object. The exact fields depend on the endpoint - some return a single object, others return a paginated list. The structure is described in the Response Body section of each endpoint page. Click on the response code to expand the list of returned fields:
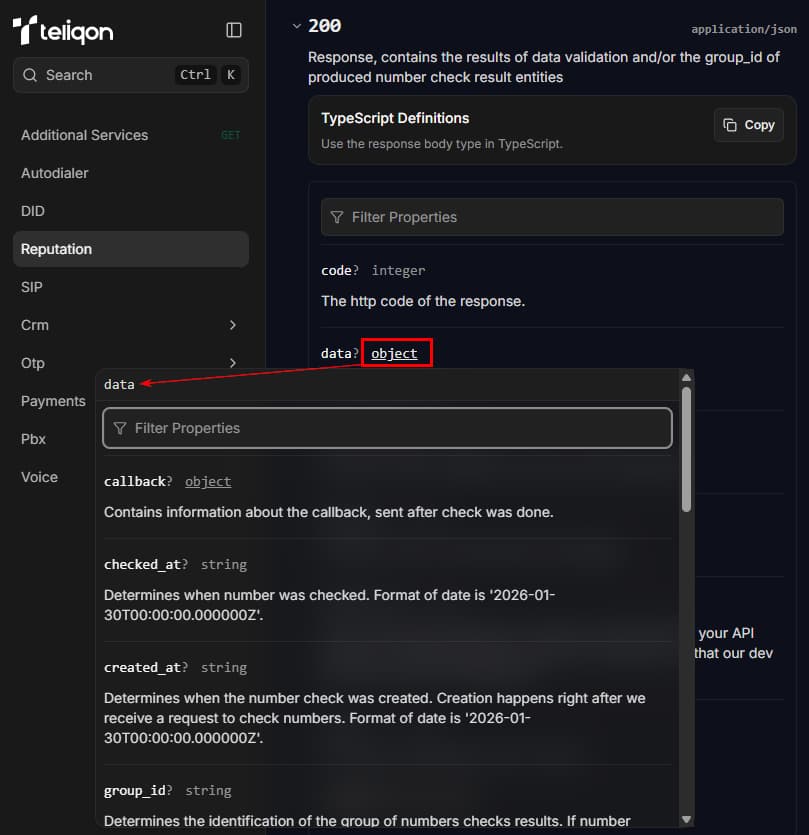
The data field contains the actual result of the request. In the documentation, some fields - including data - are shown as clickable links (for example, object). Click the link to expand it and see the full list of nested properties with their descriptions:
Error response
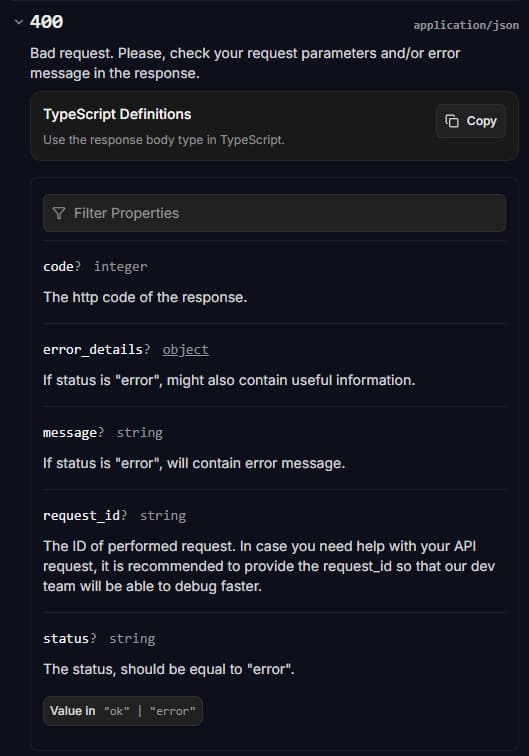
Error responses share a consistent structure. The status field is always “error”, and code contains the HTTP status code. The message field provides a human-readable explanation of what went wrong, and error_details may include additional context when available. If you need to contact support, always include the request_id - it helps the team trace the exact request. Click on the response code to view the returned fields and error details:
Interactive API console
Every endpoint page includes a built-in request editor - you can send real API calls without leaving the browser, no external tools needed.
How to use it:
- Server URL - pre-filled with the API base URL;
- Header - click to expand, then add your API token in the Authorization field;
- Body/Query - click to expand, then fill in the request parameters (such as pagination, filters, or JSON body);
- Send - click to execute the request; the live response appears immediately.
On the right side of each endpoint page you'll also find code snippets in cURL, JavaScript, Go, Python, Java, and C# - ready to copy into your project. Below the snippets, example responses for each status code (200, 400, 403, 500) show exactly what to expect from each call: